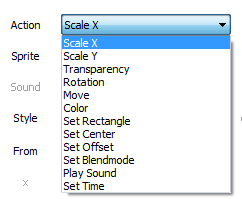
 There are a number of actions you can perform on a sprite:
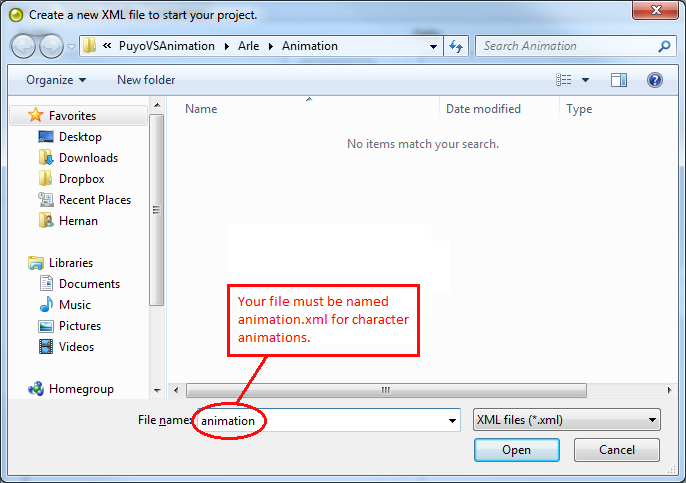
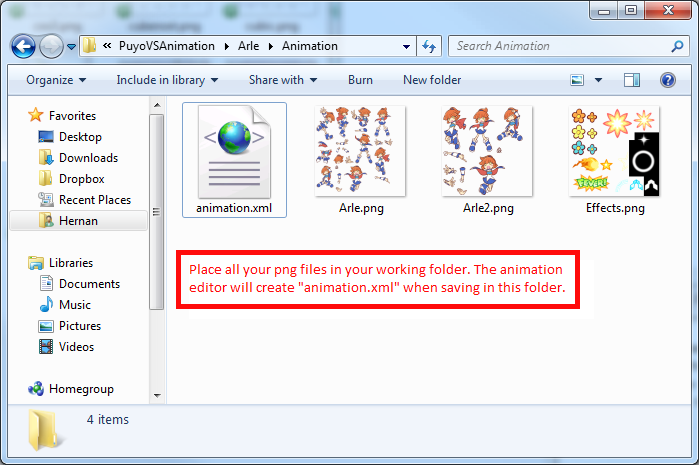
When starting the animation editor, the first thing you should do is start a new or load a new project from the menu bar. You can not begin a project before choosing which folder to work in. Prepare all your images, which must be in PNG format, and place them in your working folder. When saving, the data will be stored in the file "animation.xml".

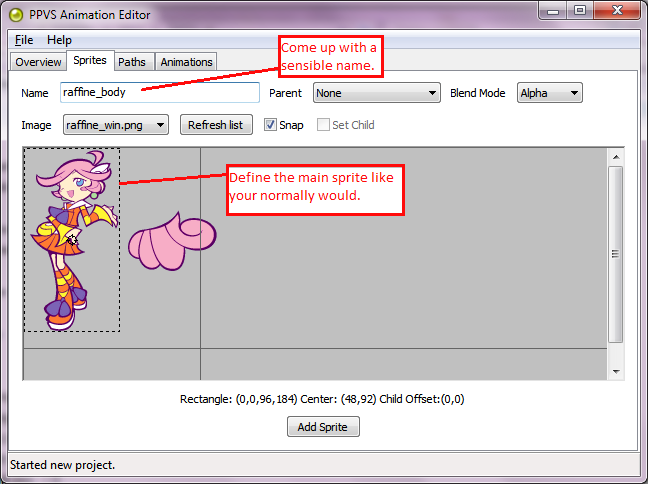
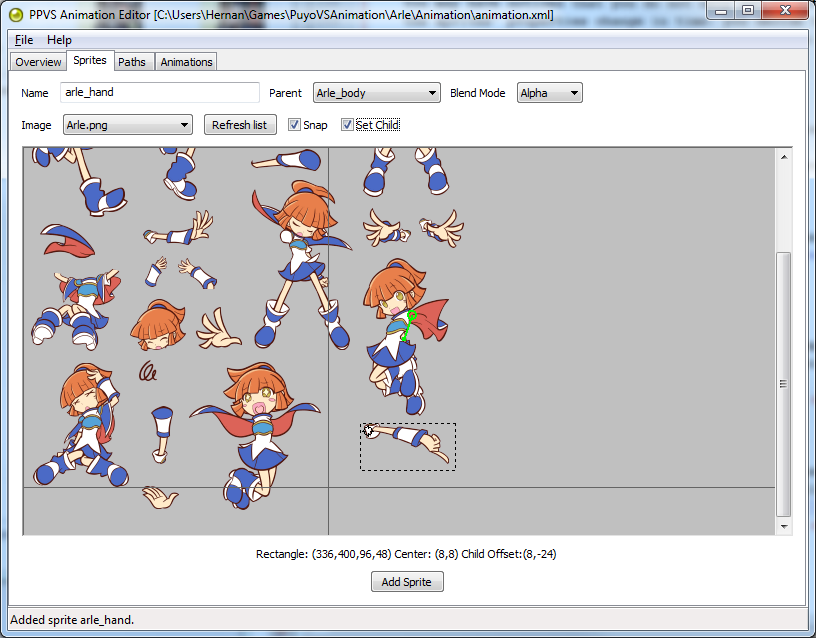
After setting up your folder, you can start defining sprites. Go to the sprite tab. Enter a name for your sprite. Pick a PNG image from the image list. You have to define the boundaries of the sprite (dotted black square). By default the whole image is taken. Use the left mouse button to redefine it. Use the right mouse button to define the center of rotation of the sprite (the black circle). The boundaries and center are snapped to a 8x8 pixeled grid. Turn off the grid with the checkbox if you like. You can alter the blend mode, which is set to alpha by default (this is the standard mode). Change it to Add or Multiply if you need to. As the name indicated Add adds pixels colors and Multiply multiplies colors.
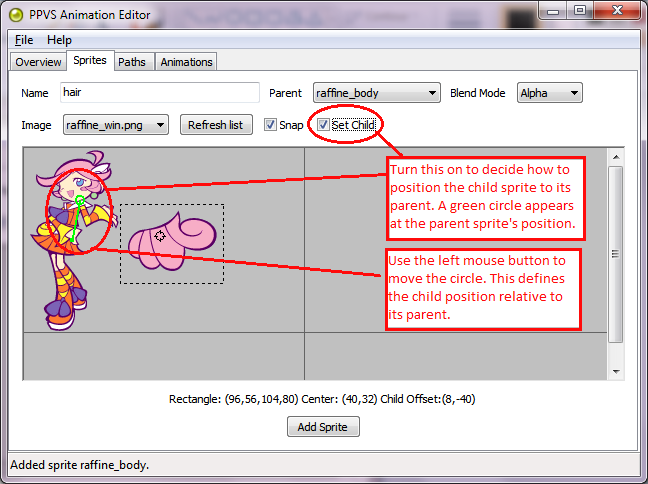
You can bind sprites to another so that they are positioned and rotated the same as their parent sprite. This is ideal for things like bodyparts. For example, look at the Raffine example below. Raffine has her body and hair seperated. Make sure both parent and child sprites are in the same image (not a requirement, but it makes things easier). First define the parent (the body) as a normal sprite.
Secondly, define the hair (the body part) normally, but select the body sprite as parent in the list. By default, the child sprite will be positioned at the center of the parent sprite.

To change the position, check the "Set Child" box, which will let you set the offset of the child sprite. A green circle will appear at the parent sprite. Use the left mouse button to move this circle at the desired position of the child sprite. In this case, we want Raffine's hair to be positioned at Raffine's head. Add the sprite and you're done.
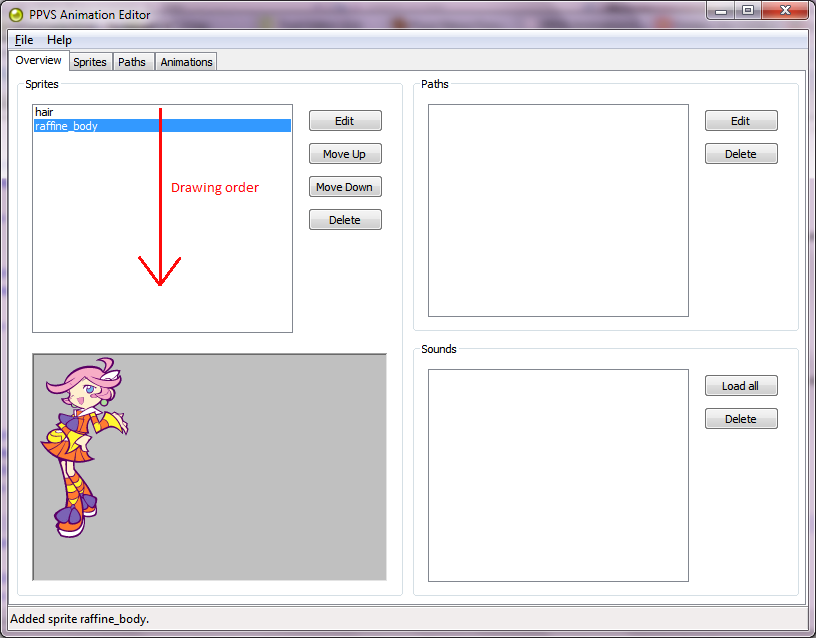
Sprites are drawn in the order they are defined. You can see the order of sprites in the overview tab. The sprites that are higher in the list are in the back. So back to the case of Raffine and her hair, we should move the hair sprite above the body sprite so that the hair appears behind the body.
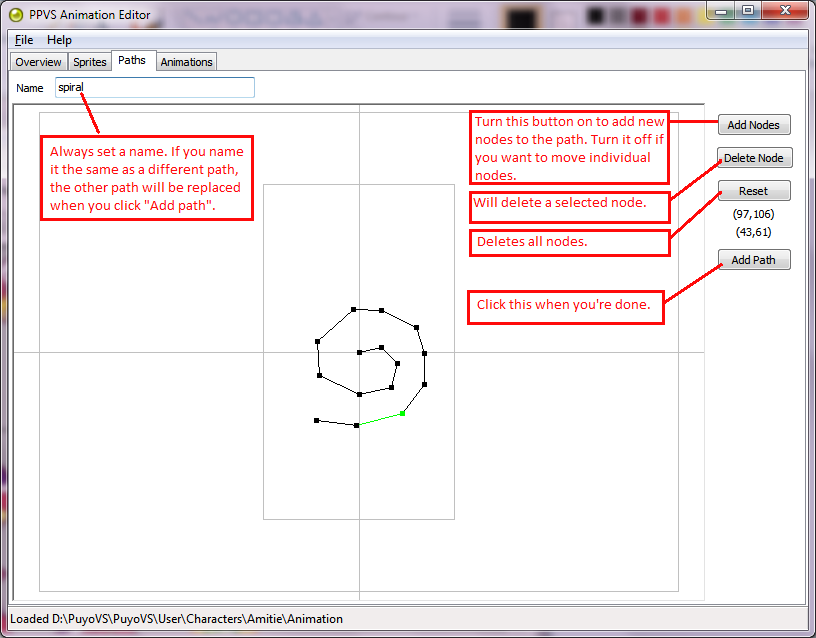
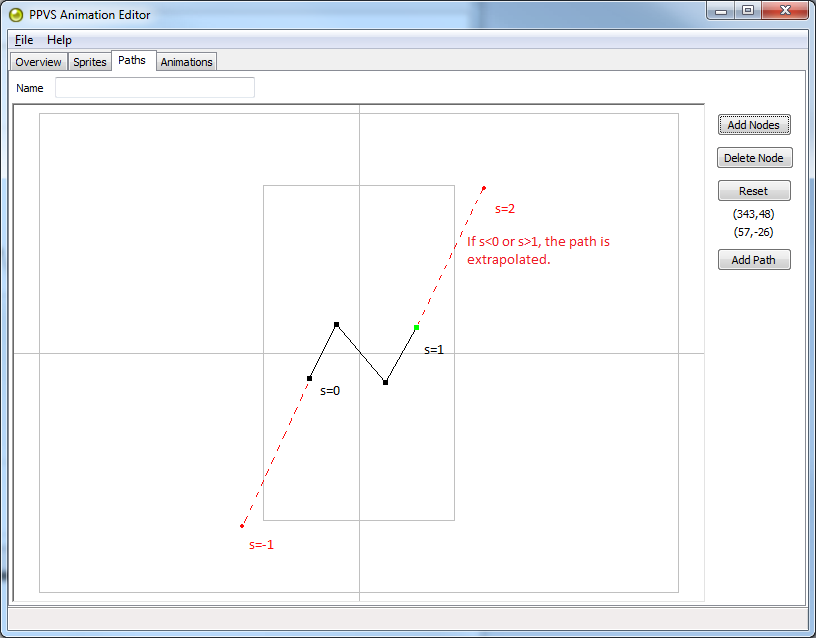
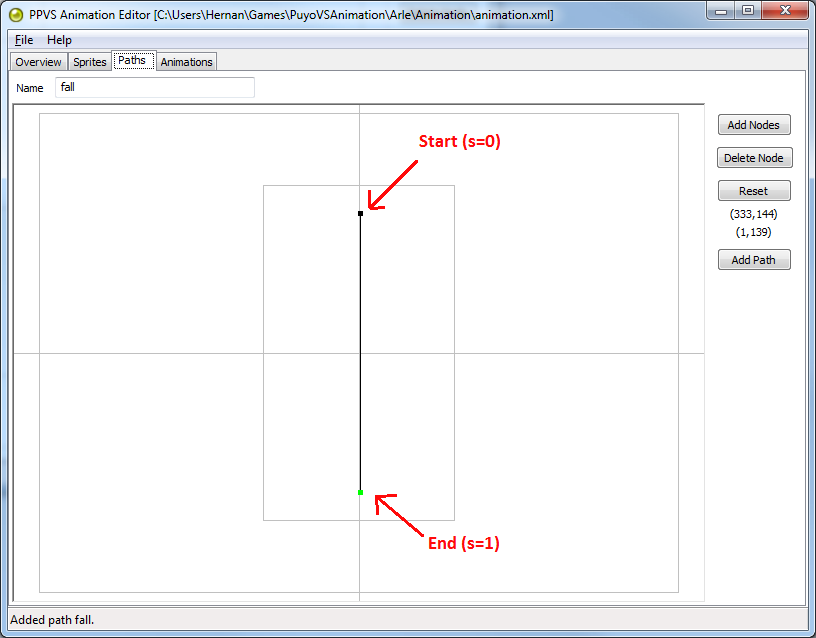
Paths are used to move sprites along a path. Define paths in the paths tab. The background has 2 rectangles for guidelines, the outer one represents the screen size (640 x 480) and the inner one represents the player field size (192 x 336). The origin (0,0) is defined in the middle of the player field. A path should have at least 1 node, so by default the first node is defined in (0,0). You can move nodes by clicking and dragging them. To add new nodes, click the "Add nodes" button.
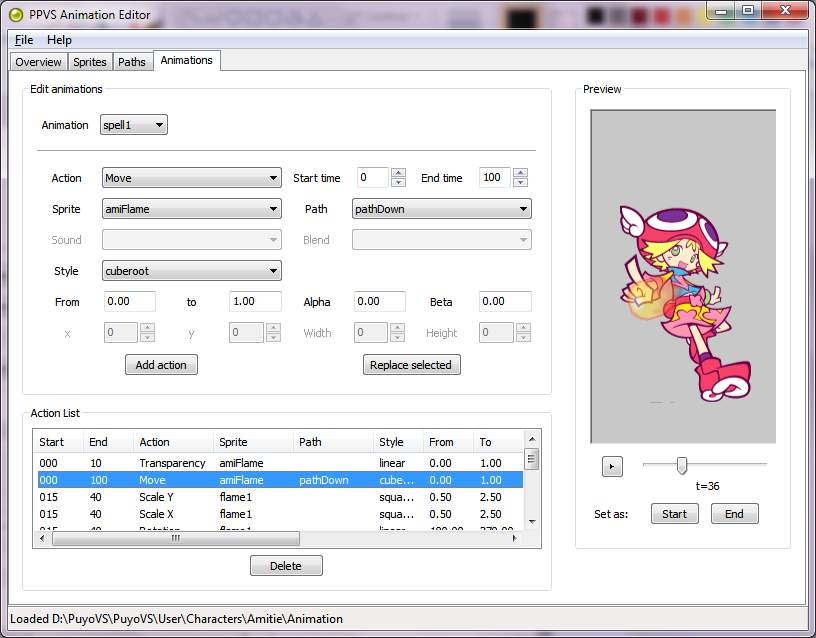
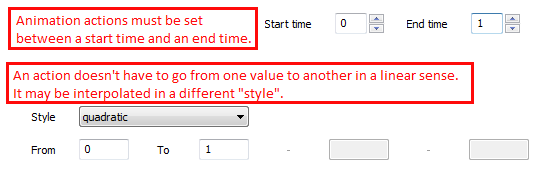
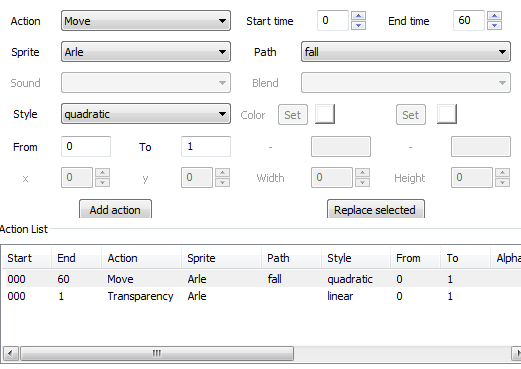
After defining sprites and paths, you can edit animations in the animations tab. Decide
which action for which sprite needs to be done. And all actions need to be done in a certain time
frame. The time runs from t=0 up to t=120, which is about 2 seconds. Use the preview window to time
your desired actions and use the "Start" and "End" button to set the start and end time to the
current time in the preview window.
The meaning of all actions are explained below,
as well as an explanation for styles. Add actions to the action list with the "Add action" button.
Delete them from the list with the "Delete button". If you want to change an action, click one in the
list and the settings will be loaded. When you press the "Replace" it will simply delete the selected
and add the new action (if none is selected, it will simply add the action).
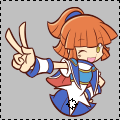
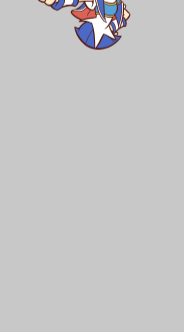
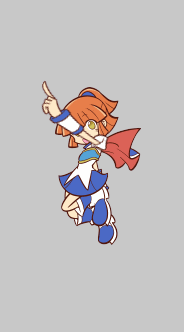
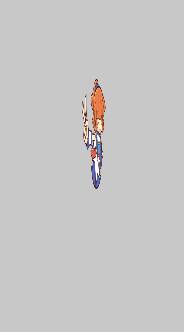
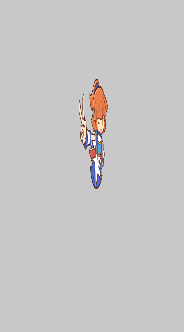
Let's use an example of this Arle sprite:
There are a number of actions you can perform on a sprite:
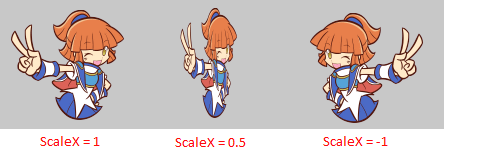
Change the scale in the x-direction of the sprite. 1 means it's scaled normally, 2 means it's scaled
twice as large etc. Setting the scale to a negative number flips the sprite!
Same as Scale X, except it applies to the y-direction.
4.1.3 TransparencyAll normal sprites start off with the transparency at 0 (completely invisible). Change it to 1 to make them appear. This is usually the first action you need to set when creating an animation.
Child sprites on the other hand start at transparency 1, because their transparency
is linked to the parent sprite. The bound sprite's transparency is automatically multiplied with
the transparency of the parent.
![]()
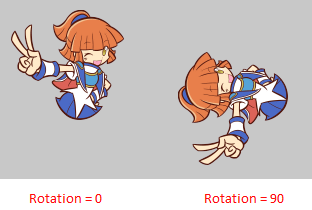
Set the rotation of a sprite in degrees (from 0 to 360). Child sprites have their rotation summed with their
parent's sprite, so while rotating with the parent it can still rotate independently.
All sprites start off at the origin (0,0), which is the middle of the field. When moving a sprite,
they must move along a path. The start of a path s is indicated with s=0, the end is indicated with s=1. If
you set s>1, then the position will be extrapolated with the slope between the last nodes. Same with
s<0, except it extrapolates with he first nodes. If you don't want to move a sprite, but just set the
position, it is recommended that you define a path with a single node. Read the explanation of
"Set Offset" for an alternative method.
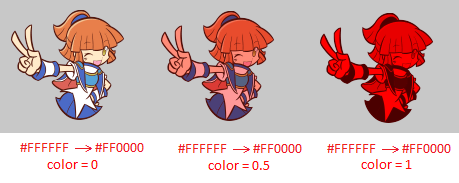
This action makes sprites blend between colors. Blending with white (#FFFFFF) sets a sprite to
its normal color. If you blend with red (#FF0000) a sprite becomes red. Set 2 colors to transition between them.
(Warning: the current version may crash if you don't set both start and end colors. Make sure
you set both colors!) Example:
Redefine the boundaries of the sprite's image. This could be useful if you want to create a framed animation, though the editor is not meant for this kind of animation.
4.1.8 Set centerRedefine the center of rotation of a sprite. Warning: this action and the set rectangle action permanently change the property of a sprite. Set rectangle and center are useful for creating animations with frames.
4.1.9 Set offsetOffset the position of a sprite. Be careful, as this also offsets the position of paths! This can be useful if you want to reuse a path, but at a different position. Tip: Click on the preview window to fill in the x and y values quickly.
4.1.10 Set blendmodeUse a different blend mode for the sprite. Usually you want to keep it at the Alpha blend mode.
4.1.11 Play soundThis particlar action has no relation to sprites. It allows a sound to be played at a certain time.
4.1.12 Set timeSet the time variable. This action is used to define a loop point. Set the end time as the loop point. Do not use this for any animation but the winning animation, as this is the only animation that loops.
You may have noticed that you do not only set an action, but you also have to set a style. This is because
the sprites' properties change in time: you decide the start and end time of an action. So you have
to decide how exactly they change from one value to another. You have a number of
options:
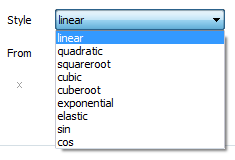
 Let's look at examples with different actions applied with different styles.
Linear is the most "normal" method to change a value: in a straight line.
In formula form: y=t
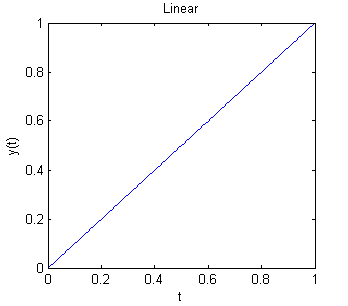
Example: transparency can be set from 0 to 1 between t=0 to t=120 to make a sprite appear slowly.
![]()
![]()
y=t^2
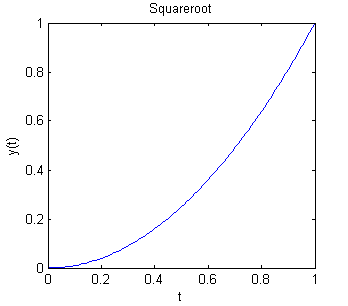
y=t^(1/2)
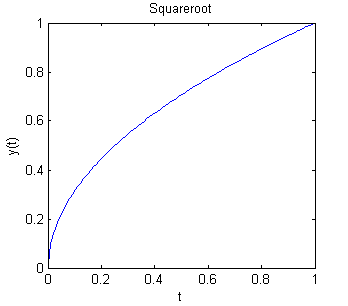
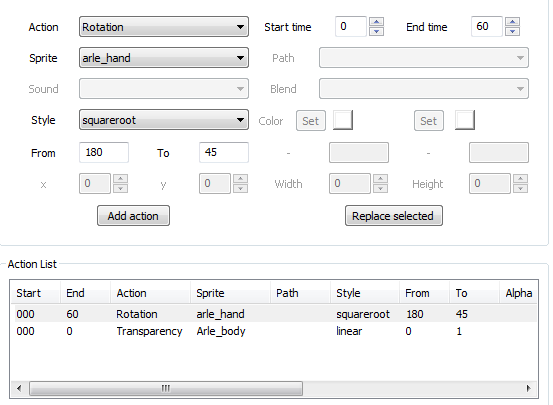
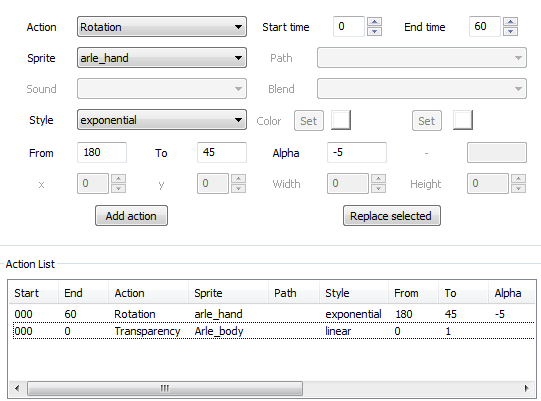
Example: we want to rotate something that starts fast, but slows down a bit later. We can use squareroot
(though cuberoot or exponential would work very well too). We define Arle's body and attach Arle's arm to it.
(Arle_body = parent, Arle_hand = child)
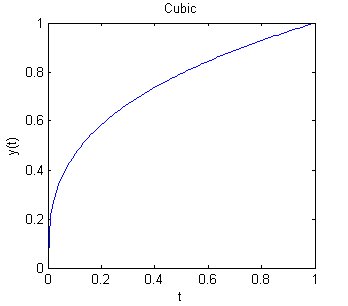
y=t^3
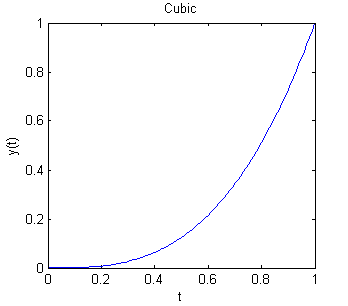
y=t^(1/3)
You can also change the factor growth factor α: y=exp(αt). Effects of increasing α:
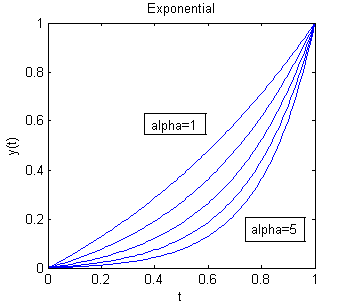
You can also set α negative for a damping effect:

Example: Let's try the previous example. But this time we use a exponential damping to create a very
fast movement at the start, but slow movement at the end. The effect is much stronger than squareroot!

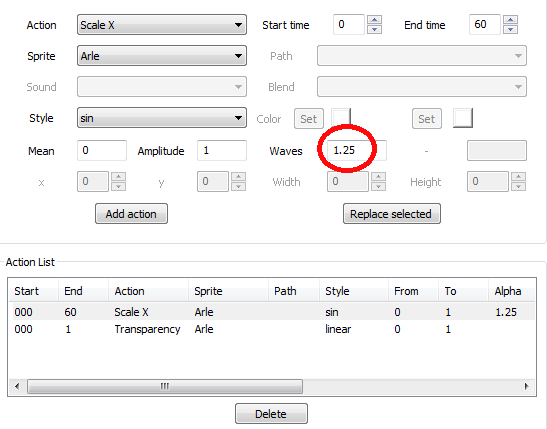
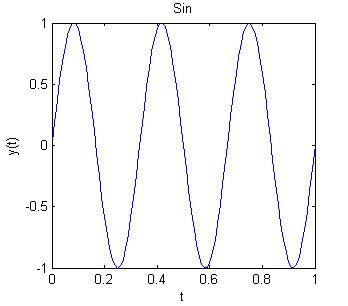
A harmonic function where α acts as the wavenumber: y=sin(αt). For example α=1 means 1 oscillation:
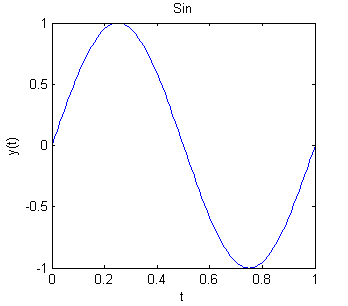
Example: The sine function is very useful in combination with scaling. You can make a sprite
spin around like you see very often in Puyo Puyo Fever.
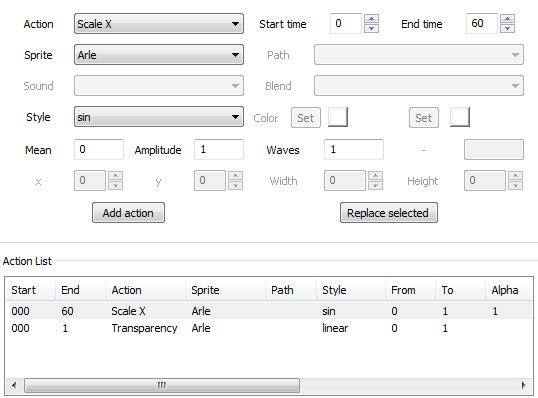
Note that the sprite here starts at scale = 0 and ends at scale = 0. Think carefully about the number
of waves if you want to end differently.
For example waves = 1.25 would mean the sprite would end at scale = 1.
To add more rotations: α=3 means 3 oscillations (Waves = 3):
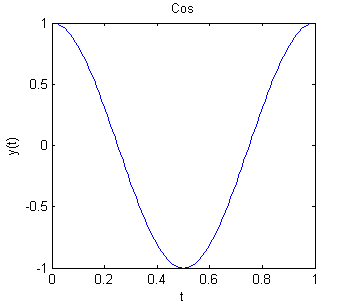
Same thing as the sine function, except cosine starts at 1:
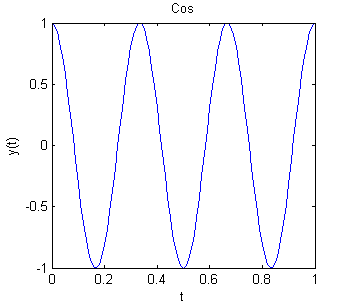
And with α=3:
The elastic function is the combination of the exponential function with a harmonic
function: y=exp(αt)*cos(βt).
Where α is the growth and β the wavenumber. Using this can create fun effects. For example
with α=-4 and β=2, you will get a strong damping effect with 2 oscillations:
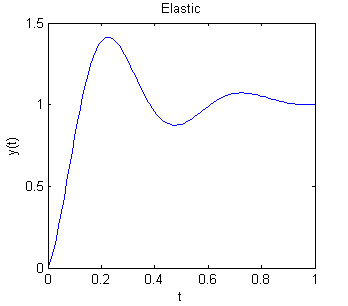
It's kind of like an elastic, so this is ideal for effects for things like bouncy puyos.
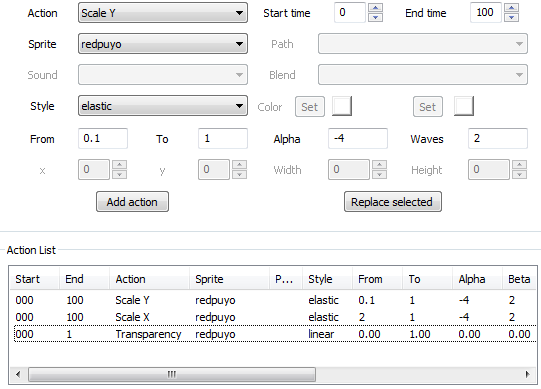
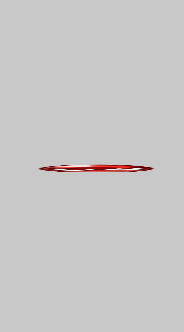
Example: Let's make a bouncy puyo:
Set its transparency from 0 to 1 (linear) at t=0 to t=10.
Set ScaleX from 2 to 1 (elastic) alpha=-4 wavenumber=2 at t=0 to t=100
Set ScaleY from 0.1 to 1 (elastic) alpha=-4 wavenumber=2 at t=0 to t=100
I hope you understand how to make animations now. I apologize for the confusing interface the animation editor has. Here are some tips I'd like to give you: